Using WordPress as a CMS

Standard

I’ve used dozens of Content Manage Systems, both open source versions like Drupal and Joomla and Enterprise level ones as Microsoft CMS and others. They all have one thing in common – they suck (that is a technical term for “providing less than optimal results”). Either they are too complicated or too simplistic, or in some cases, both at the same time. After some experimentation I have found a CMS that works perfectly for most of my needs, and if it do not fit a project I write my own (as I did for WebHostNinja.com). This perfect(ish) CMS is the blogging platform WordPress.

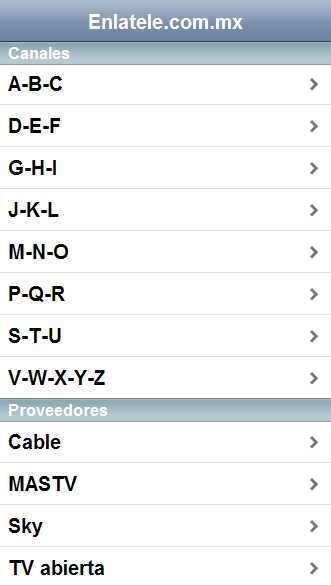
At the moment I am using WordPress as a CMS for several websites. Of course this blog is running on WordPress, not that suprising really since it is a blog. The main site of blendapps.com is all WordPress, while the acctual chat application that integrates Meebo chat with Ning social networks, run on the subdomain chat.blendapps.com and is implemented on Google App Engine. For Blendapps.com there is both a seperate blog section and a content section, so it is by no means a pure blog. Mashup.se is also running WordPress, and there I have tried to have more of a newspaper feel than a pure blog. The purest use of WordPress as a CMS is probably on restillmexico.se (swedish travel guide to Mexico), that site doesn’t even have a blog.

Why WordPress?
My requirements for a CMS are simple – it should be quick to implement a new site, it should be easy to maintain a site and it should be easy to expand and customize the site when it grows. A plus is if it runs on LAMP, so I can hack it if neccessary and so I can host it anywhere. There is not really any need to support multiple concurrent users since it is mostly going to be yours truley doing the work. Not rocket science really, but evidently damn hard to implement since most CMSes miss the mark by miles.

Let’s take a look why WordPress live up to these requirements:

  • Quick to implement a new site – setting up WordPress is a matter of minutes. Get the WordPress files, set up a database and go. For some extra bonus you can add the plugins you need and choose one of 100’s of free well done themes to get the look you want. You can of course also do as I do and get a professional design and just add that on top of an exising theme.
  • Easy to maintain – the WordPress control panel is easy to use, and if you dont like it you can change it around with plugins (see below for some such plugins). WordPress and most plugins are continously updated and to install updates is a breeze. All you need – such as static pages, blog posts, tagging, categories, multiple users, comments, spam protection (Akismet) etc is all part of the basic WordPress install.
  • Easy to expand and customize – again, the plugins are really great for customization. Also, WordPress have really powerful and usefull template tags that allows you to customize the theme well beyond recognition. See tips and tricks below for more details.
  • LAMP – check. All written in PHP and uses a MySQL database perfectly. Even if I at times have hacked the WordPress core files it is not really necessary, but the key thing is that it is possible.

Pages and Custom Fields are your friends
Content in WordPress can be either shown in “posts” or “pages”, where posts are blog posts and pages are static content. Under the surface it is all the same, both posts and pages are stored in the same tables, but they are still treated a bit differently. If you are using WordPress as a CMS then pages are definitly your friends. I have found that pages are a little easier to organise if you are not writing a blog. You can set a page as the front page of your site in the WordPress control panel. Go into settings -> reading and choose what page you want as front page.

Custom Fields are data fields that are not part of the core WordPress installation but that you define yourself. A custom field is attached to a post or a page and can be used to store any extra info that WordPress or plugins dont handle. For restillmexico.se I use it to store the URL or the images for each page, as well as the attribution of the images etc (a trick from WordPress Custom Fields: Adding Images To Posts).

Plugins to turn WordPress into a CMS
Even if a basic WordPress installation works fine as a CMS there are a few plugins that makes your life easier:

  • CMS-like admin menu –  all it does is make posts second to pages in the menus, ie puts pages before posts. If all you have on your site is pages then this plugin is a nice touch.
  • PageMash – drag and drop interface to order pages. Makes it very easy to change order as well as set parent/child relationship among pages. I especially use this one heavily to organise the hierarchy at restillmexico.se.
  • Page Excerpt – adds the excerpt functionality of posts to pages
  • Query Child Of – makes it possible to list the children of a page in your theme, great in combination with PageMash mentioned above
  • Admin drop down menu – it gives the control panel a drop down menu, which is quicker and easier to use than the standard control panel menu. Not really unique for using WordPress as a CMS, but I really like this plugin.

Tips and tricks
To hack a wordpress theme to work as well as a CMS there are a few tips and tricks. The first tip is to not hack at all, just use the great CMS2 theme. It already has a page focus and most of the organisation needed for a static web site. For the sites I have on WordPress I have either customized this theme or one of the themes that comes with the basic WordPress install.

When customizing a theme there are some WordPress template tags that will save you a lot of time:

  • wp_list_pages – allows you to list the pages you have in your site, pefect to create a menu with. You can include or exclude any pages you want.
  • query_posts – get the posts you want by using the parameters to this tag. Since pages and posts really are the same thing this tag can be used to list pages when wp_list_pages doesn’t do exactly what you need.
  • get_post_meta – get the value of a specific custom field for a page or a post, necessary to be able to get the most out of custom fields.

Summary
Wordpress is a very good option as a CMS, not just for blogs but for static sites as well. With the great choice in plugins and the open source code of WordPress you can get it to do almost anything you want without serious hacking. The huge installbase ensures that you can find help and resources if you need it.

Mashup.se – about mashups and APIs in Swedish

Standard

Last week I finally relaunched mashup.se. I have had that domain for a couple of years now and started my blogging there in 2006. But I was never happy with the content and the direction it took, in the end it became nothing more than general tech news and I lost interest. Now, at the relaunch, it is much more focused. The idea is to write about mashups and APIs from a swedish angle (yes, the site is all in Swedish, but thanks to Google Translate that is no problem, click here for the English version). There are so many mashups and APIs, but most of them are from the US and have very US specific content. An API that only produces content about the US in English is of very little help to a developer writing apps for the Swedish market.

Hopefully I can create a good collection of swedish mashups and APIs and at the same time get to know more what is going on in Sweden. Since I am not only going to write about specifically Swedish stuff, but also US APIs that are of interest to Swedes, I think that it will also help me write more posts for digitalistic.com. After all a mashup built with Yahoo’s BOSS mashup framwork is of interests to geeks everywhere (at least if you are the kind of geek I am).

Writing an iPhone page in minutes using IUI

Standard

The 3G iPhone was released a few weeks ago, so it’s time to write a page or application for the iPhone and try to ride the hype wave for all it is worth. So I started working on an iPhone specific page for enlatele.com.mx – after all why shouldn’t Mexicans be able to find their TV-schedule on their iPhone? You can see the finished result on iphone.enlatele.com.mx. Since all I want to do is show web based content in the iPhone there is no need to start using the iPhone API and build an actual application, so instead I built a web page aimed specifically at the iPhone, and it was suprisingly easy!

Some general lessons I learned before we jump into the actual code:

  • iPhone pages are all about lists, the more lists the better apparently. On the smaller screen you can not really do much more than lists, and if you want to do more then just let the iPhone user browse your normal web page.
  • Write a seperate page for the iPhone, do not detect if a site visitor is using the iPhone and automatically server up the iPhone page. One of the cool things about the iPhone is that it is possible to interact with normal web pages quite well on a small screen, dont take this away from the iPhone user. Instead create a subdomain specifically for this, for example iphone.enlatele.com.mx, or m.enlatele.com.mx.
  • The iPhone connection is not always the best, so do not serve lots of images etc if there is not a real need for it. This might not be true with the new 3G iPhone in the middle of New York or Stockholm, but writing an iPhone page for Mexico I’d rather be safe than sorry and keep the number of images to a minimum.

I used just HTML, CSS and JavaScript, packaged up very nicely in the IUI framework. Basically all you do is download a CSS file and a JavaScript file, import them into your HTML page and write lists with certain CSS classes and IUI takes care of all the rest. IUI even has minimized versions of the CSS and JavaScript file you can use to make the page even smaller (and thus a quicker download to the iPhone). This is what I have in the header of my page:

<meta name="viewport" content="width=320; initial-scale=1.0; maximum-scale=1.0; user-scalable=0;"/>
<style type="text/css" media="screen">@import "iui/iuix.css";</style>
<style type="text/css" media="screen">@import "styles.css";</style>

The meta tag “viewport” is needed to let the Safari browser on the iPhone know how to deal with the content, without that tag you risk that the page acctually looks worse in the iPhone than in a regular browser.

In the body of my HTML document I specify the menus of my iPhone, ie lists lists and more lists. The code for the start menu is:

<ul id="home" title="Enlatele.com.mx" selected="true">
<li class="group">Canales</li>
<li><a href="channelgroup.html?=canales_abc">A-B-C</a></li>
<li><a href="channelgroup.html?=canales_def">D-E-F</a></li>
<li><a href="channelgroup.html?=canales_ghi">G-H-I</a></li>
<li><a href="channelgroup.html?=canales_jkl">J-K-L</a></li>
<li><a href="channelgroup.html?=canales_pqr">P-Q-R</a></li>
<li><a href="channelgroup.html?=canales_stu">S-T-U</a></li>
<li><a href="channelgroup.html?=canales_vwxyz">V-W-Y-X-Y-Z</a></li>
<li class="group">Proveedores</li>
<li><a href="#sky">Sky</a></li>
<li><a href="#cablevision">Cablevision</a></li>
<li><a href="#mastv">MASTV</a></li>
<li><a href="#tvabierta">TV Abierta</a></li>
</ul>

And this results in this page (as can be seen on iphone.enlatele.com.mx):

startpage.png

IUI styles it all nicely. The key parts of this list is:

  • the id “home” on the ul tag. Ids like this are used throught IUI to identify submenus etc. For example the link to Sky is <a href="#sky">Sky</a> this links to another ul list on the same page with the id “sky” – <ul id="sky" title="Sky">. This means that I can have most of my menu structure, submenus and all, on one page. So once this page is downloaded to the iPhone the phone do not need to access the internet just because you click on a link to a submenu.
  • title="Enlatele.com.mx" is the header of the page
  • selected="true" on the ul means that this is the first menu to load.
  • <li class="group">Canales</li> creates a grouping in the menu, a nice way to make things look fancy without acctually doing any work
  • now to a really nice thing about IUI, it takes care of loading content dynamically into your current page seamlessly. For the enlatele iPhone page there are listings of TV channels that are not loaded to the iPhone unless the user clicks on a link in the menu to do this. So if a user wants a list of all channels that starts with A, B or C he would click on the following link in the menu – <li><a href="channelgroup.html?=canales_def">D-E-F</a></li>. IUI would then insert the content of channelgroup.html into the page basically using AJAX (don’t worry about the ?=canales_def – that is just so that the enlatele backend knows what to load). The channelgroup.html page should _only_ contain a list of channels to show once this link is clicked, nothing else:

<ul id="canales_abc" title="Canales A-B-C">
<li><a href="channel.html?canal=a_e_mx_west">A&E MX West</a></li>
<li><a href="channel.html?canal=american_network">American Network</a></li>
<li><a href="channel.html?canal=animal_planet_latinam">Animal Planet LatinAm</a></li>
<li><a href="channel.html?canal=animax">Animax</a></li>
</ul>
So no HTML start tags or BODY tags or anything else, just the list you see above, that is the whole of channelgroup.html.

IUI also deals with other things you really want on an iPhone page, such as automatically inserting a back button (that only looks good in Safari since it is using Safari specific functions, so if it looks crappy when you test in Firefox do not worry), showing a nice loading graphic etc. There are also a lot of more fancy stuff that can be done with IUI, but just the basic can get you a long way. This is pretty cool stuff I think, and it makes is really quick to implement something that works great and looks great on the iPhone. Of course there is a big part missing here, and that is the backend acctually filling these pages with content (in the enlatele case dynamically creating the channel list based on what is in the enlatele database), but that is standard programming stuff so I wont cover it here.

If you are interested in doing more mobile content, especially design, check out Yahoo’s Design Stencil Kit for mobile. It contains all the building blocks you need to do mockups and designs for the iPhone and other mobile platforms.

Mashups are built on trust, but I am paranoid, so what to do?

Standard

By their very nature Mashups are built on trust..

  • You have to trust the API providers to keep that API up and running. Anyone that has done Twitter mashups know how much keeping an API up and running is worth.
  • You have to trust the API providers to keep the API (somewhat) stable and to not remove features that you are depending on, or add features you really dont want. An example of this is all the mashups built on Google Maps, and we all know that there are way too many of those. Have the developers of those mashups really thought about what happens when Google puts ads on the Maps (and they will, they have already started in parts of the US)? I dont think so, the developers just trust Google to keep on going. If you have a commercial site using Google Maps you probably do not want ads for your competitors on those maps.
  • If your mashup becomes a success you have to trust the API providers you are depending on not to change their terms of service so that your mashup suddenly becomes an illegal use of the API. Also, you have to trust the API provider not to use the fact that you are depending on their API for your business against you in a business negotiation.
  • If you use web scraping you have to trust the site you scrape not to change to often (or at least trust your own ability to roll with the punches and update your scraping so it works with the new version of the site as well) etc. That is a lot of trust, and when mashups move from toys into real applications this becomes an issue.

All these things makes me a bit nervous, as I am a bit paranoid (note: this has not been clinically proven, I still think that THEY are out to get me). So how to mix a healthy bit of paranoia into my mashup building and get something good out of it all? What I do is that I always try to be aware of that I might have to switch API provider. Are you building a Twitter mashup? Why not also take a look at Jaiku’s API, or Pownce’s API (or Plurk or FriendFeed etc etc). You dont have to build your mashup so you can switch API provider in a matter of minutes, just be aware what else is out there so that you see the commonalities and don’t use to many features unique to one provider. This is the approach I am currently using when I am building mashups, at least I know that if shit hits the fan I can always go with somebody else. It will hurt a bit and take some effot, but I am not dead in the water. For the Google Maps example this would mean looking at Yahoo Maps and see what features the Yahoo Maps API have in common with the Google Maps API, and just use those common features. This can also come in handy if you hit the maximum number of requests on Google Maps, then it would be nice switch to Yahoo Maps automatically.

The risk with all this is of course to spend to much time preparing for something that won’t happen. It is the same situation as developers spending so much time making their code perfectly scalable and optimized that they acctually never ship anything in time. So dont go too far, but be aware of the situation. Trust is nice, but trusting several API providers to always do a good job and to not be evil in order for you to survive is quite risky.

10 Easy Steps to use Google App Engine as your own CDN

Standard

When the big boys run websites (basically any brand name site you can think off) they use Content Delivery Networks (CDN’s) to host most of their content, especially images, stylesheets, files to download and other static content. The reason they do this is that the less they have to host themselves the less load they have on their servers, and the more content they can host closer to the end user the quicker the user can download it. The most famous CDN is probably Akamai, that almost run their own parallell internet. Akamai and other CDN providers cost big bucks though, so it is nothing for us mere mortals.

But thanks to Google anyone can now run their own CDN for free on Googles servers. It is really easy to set up and storing files for downloads, stylesheets etc on Google instead of on your own site takes the load of your servers (and consumes much less bandwidth of your hosting account) and speeds things up for the end users. It’s a win win situation, and it is also really really cool! If you are interested in more information about how to get the maximum performance from your web site then I recommend you read the excellent post Performance on a Shoe String on 24ways.

What is Google App Engine?
Using Google App Engine you can run web applications on Google’s servers. That means that you can benefit from Google’s huge world-wide server farms, it means that it is really easy to scale and to integrate with othe Google applications (for example using Google authentication in your applications). At the moment you have to write your applications in Python (don’t worry: no coding at all needed to use Google App Engine as a CDN, just keep reading), but hopefully they will expand it to other languages soon (personally I want to run PHP and CodeIgniter on Google App Engine!). The App Engine is Googles response to Amazons very successfull web services S3 (for storage) and EC2 (for computing). Amazons services are very powerful, but they do require a deeper level of technical knowledge to use than Google App Engine.

Currently Google App Engine is in a Preview Release (= beta), but it is free for anyone to join, all you need is a Google Account and a cell phone (more about this later). What you get is 500MB of free storage and around 5 million free pageviews a month, if you use more than that there is a small cost (see the Google App Engine blog for more details). The cost for these extra resources are almost the same as for Amazons Web Services, and with the freebies and ease of use thrown in Google App Engine is a bargin.

How to set up your own CDN
To use Google App Engine as your own personal CDN you need to install some things on your computer and edit a few configuration files. All this work is a one time thing though, after that all you need to do is run a simple program to upload new files to Google. Sorry to say that the scripts you download is for Windows only, if you are on a Mac or using Linux then you need to make your on script to do what deploy_digitalistic_cdn.bat does (if you do so please add this to the comments of this post for any one else to use).

  1. Since Google App Engine only works with the programming language Python you need to download and install Python on your computer. If you have a Mac or run Linux you most probably already have Python installed, so you can skip this step. Download the correct installation file for your OS from Python 2.5.2 from http://www.python.org/download/ and install it. Use the default settings, except install it under “Program Files” instead of directly on the C: drive (or install it wherever you want, but in then you need to modify the scripts below.
  2. Download Google App Engine SDKDownload the Google App Engine SDK from http://code.google.com/appengine/downloads.html and install it. During the SDK installation it will check if you have Python or not, so if you have a Python installation problem you will know it already here. The Google App Engine SDK is needed to be able to write and upload applications to Google. Just use the default settings when installing the SDK.
  3. Sign up for Google App Engine at appengine.google.com. For this you need a Google account (your GMail address for example, if you dont have one it is free to create one).
  4. GAE SMS verificationCreate Google ApplicationOnce you are signed up you need to create an application, so just click on the button “Create an Application” and give your application a name (called “application identifier”). This name needs to be unique among all users applications, so it might take a while to find a unique one. In my case I used “digitalisticcdn”. Save your new application. After you have created your first application you need to specify your cell phone number. Google will then send you a SMS with a code that you enter into their site. This confirms that you are the owner of this Google App Engine account (so don’t use it for spamming ;).
  5. Download the file http://digitalisticcdn.appspot.com/files/digitalisticcdn.zip (hosted on my private CDN!) and unzip it to your harddrive. If you want you can rename the unzipped directory from “digitalisticcdn” to whatevery you want, for example the name of your own application. It doesnt really matter, it just makes easier for you to keep track of things in the future.
  6. Use a text editor to edit the app.yaml file in the digitalisticcdn directory. Change “application: digitalisticcdn” to “application: <your application identifier” and save the file. This will tell Google App Engine what application to upload your files to.
  7. Now it is time to add all the images, stylesheets, files, videos etc you want to upload to Google to the folders in the digitalisticcdn directory. Put all images into the /images folder etc. You can create any number of subfolders inside the images, files, stylesheets etc folders (for example /images/webhostninja.com/ninja.gif). You can always add more files at a later time, so if you just want to set things up to work you can skip this step for now. There is already an image in the /images folder for you to test that all is working as it should be.
  8. Download http://digitalisticcdn.appspot.com/files/deploy_digitalistic_cdn.bat and edit it in a text editor. This file needs to point out your Python installation, your Google App Engine installation and your digitalisticcdn directory. If you installed the Google App Engine SDK in the default directory and Python in C:/Program Files/ then you don’t have to worry about those settings. Just change the last part of the file to point to your digitalisticcdn directory. Keep in mind that all paths with spaces in needs to be surrounded by quotes.
  9. Double click on the newly changed deploy_digitalistic_cdn.bat file to upload all the files in the digitalisticcdn directory to Google. The first time you do this you need to specify your Google username and password.
  10. Ninja from WebHostNinja.comYou now have your own private CDN! Go to <your-application-identifier>.appspot.com/images/ninja.gif (in my case digitalisticcdn.appspot.com/images/ninja.gif) to see that it works.

How to use your private CDN
To use the files you upload to your Google App Engine CDN you just need to use the URL to the file on your site. If you want to show an image of a cool ninja from WebHostNinja.com you would just use digitalisticcdn.appspot.com/images/ninja.gif as your image source in your HTML. The same goes for stylesheets, files to download or whatever else you want to share on your CDN.

At any time you can add new files to your digitalisticcdn subdirectories (/images, /stylesheets etc) and run the deploy_digitalistic_cdn.bat file to upload them to Google. If you remove files from your digitalisticcdn directory and then run the bat file they will be deleted from your Google application.

You can check the statistics of your Google Application at appengine.google.com. For example you can see how much bandwidth and disk space you are using. It will take quite a lot of files and usage for you to use up the resources you get for free, but if you have a super popular site then it is worth taking a look here every now and then.

If you have read so far and found all this usefull then please Digg it. Thanks!