
When the big boys run websites (basically any brand name site you can think off) they use Content Delivery Networks (CDN’s) to host most of their content, especially images, stylesheets, files to download and other static content. The reason they do this is that the less they have to host themselves the less load they have on their servers, and the more content they can host closer to the end user the quicker the user can download it. The most famous CDN is probably Akamai, that almost run their own parallell internet. Akamai and other CDN providers cost big bucks though, so it is nothing for us mere mortals.
But thanks to Google anyone can now run their own CDN for free on Googles servers. It is really easy to set up and storing files for downloads, stylesheets etc on Google instead of on your own site takes the load of your servers (and consumes much less bandwidth of your hosting account) and speeds things up for the end users. It’s a win win situation, and it is also really really cool! If you are interested in more information about how to get the maximum performance from your web site then I recommend you read the excellent post Performance on a Shoe String on 24ways.
What is Google App Engine?
Using Google App Engine you can run web applications on Google’s servers. That means that you can benefit from Google’s huge world-wide server farms, it means that it is really easy to scale and to integrate with othe Google applications (for example using Google authentication in your applications). At the moment you have to write your applications in Python (don’t worry: no coding at all needed to use Google App Engine as a CDN, just keep reading), but hopefully they will expand it to other languages soon (personally I want to run PHP and CodeIgniter on Google App Engine!). The App Engine is Googles response to Amazons very successfull web services S3 (for storage) and EC2 (for computing). Amazons services are very powerful, but they do require a deeper level of technical knowledge to use than Google App Engine.
Currently Google App Engine is in a Preview Release (= beta), but it is free for anyone to join, all you need is a Google Account and a cell phone (more about this later). What you get is 500MB of free storage and around 5 million free pageviews a month, if you use more than that there is a small cost (see the Google App Engine blog for more details). The cost for these extra resources are almost the same as for Amazons Web Services, and with the freebies and ease of use thrown in Google App Engine is a bargin.
How to set up your own CDN
To use Google App Engine as your own personal CDN you need to install some things on your computer and edit a few configuration files. All this work is a one time thing though, after that all you need to do is run a simple program to upload new files to Google. Sorry to say that the scripts you download is for Windows only, if you are on a Mac or using Linux then you need to make your on script to do what deploy_digitalistic_cdn.bat does (if you do so please add this to the comments of this post for any one else to use).
- Since Google App Engine only works with the programming language Python you need to download and install Python on your computer. If you have a Mac or run Linux you most probably already have Python installed, so you can skip this step. Download the correct installation file for your OS from Python 2.5.2 from http://www.python.org/download/ and install it. Use the default settings, except install it under “Program Files” instead of directly on the C: drive (or install it wherever you want, but in then you need to modify the scripts below.
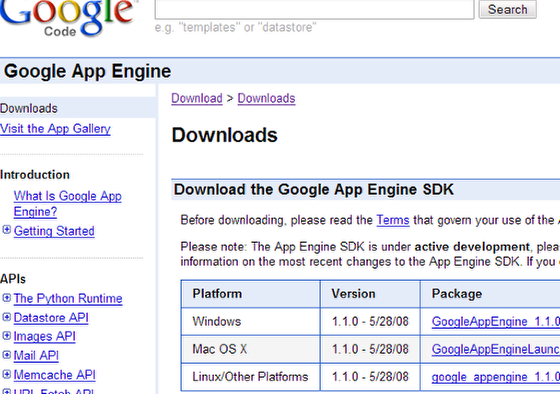
 Download the Google App Engine SDK from http://code.google.com/appengine/downloads.html and install it. During the SDK installation it will check if you have Python or not, so if you have a Python installation problem you will know it already here. The Google App Engine SDK is needed to be able to write and upload applications to Google. Just use the default settings when installing the SDK.
- Sign up for Google App Engine at appengine.google.com. For this you need a Google account (your GMail address for example, if you dont have one it is free to create one).
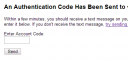
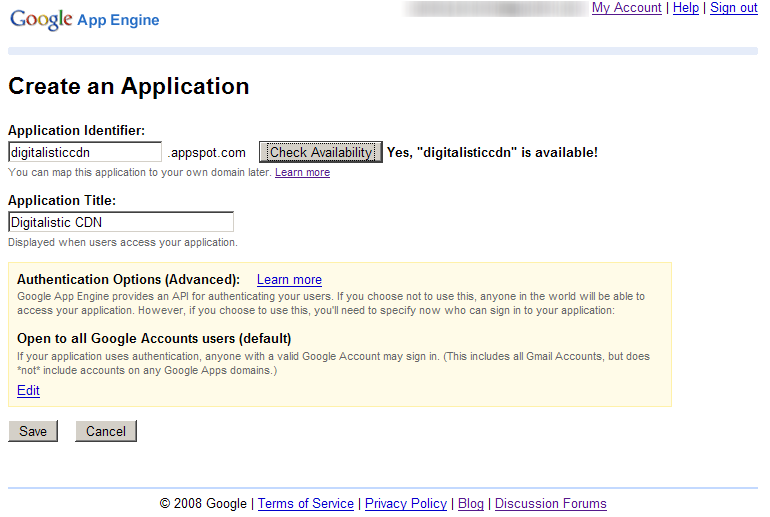
 Once you are signed up you need to create an application, so just click on the button “Create an Application” and give your application a name (called “application identifier”). This name needs to be unique among all users applications, so it might take a while to find a unique one. In my case I used “digitalisticcdn”. Save your new application. After you have created your first application you need to specify your cell phone number. Google will then send you a SMS with a code that you enter into their site. This confirms that you are the owner of this Google App Engine account (so don’t use it for spamming ;).
- Download the file http://digitalisticcdn.appspot.com/files/digitalisticcdn.zip (hosted on my private CDN!) and unzip it to your harddrive. If you want you can rename the unzipped directory from “digitalisticcdn” to whatevery you want, for example the name of your own application. It doesnt really matter, it just makes easier for you to keep track of things in the future.
- Use a text editor to edit the app.yaml file in the digitalisticcdn directory. Change “application: digitalisticcdn” to “application: <your application identifier” and save the file. This will tell Google App Engine what application to upload your files to.
- Now it is time to add all the images, stylesheets, files, videos etc you want to upload to Google to the folders in the digitalisticcdn directory. Put all images into the /images folder etc. You can create any number of subfolders inside the images, files, stylesheets etc folders (for example /images/webhostninja.com/ninja.gif). You can always add more files at a later time, so if you just want to set things up to work you can skip this step for now. There is already an image in the /images folder for you to test that all is working as it should be.
- Download http://digitalisticcdn.appspot.com/files/deploy_digitalistic_cdn.bat and edit it in a text editor. This file needs to point out your Python installation, your Google App Engine installation and your digitalisticcdn directory. If you installed the Google App Engine SDK in the default directory and Python in C:/Program Files/ then you don’t have to worry about those settings. Just change the last part of the file to point to your digitalisticcdn directory. Keep in mind that all paths with spaces in needs to be surrounded by quotes.
- Double click on the newly changed deploy_digitalistic_cdn.bat file to upload all the files in the digitalisticcdn directory to Google. The first time you do this you need to specify your Google username and password.
 You now have your own private CDN! Go to <your-application-identifier>.appspot.com/images/ninja.gif (in my case digitalisticcdn.appspot.com/images/ninja.gif) to see that it works.

How to use your private CDN
To use the files you upload to your Google App Engine CDN you just need to use the URL to the file on your site. If you want to show an image of a cool ninja from WebHostNinja.com you would just use digitalisticcdn.appspot.com/images/ninja.gif as your image source in your HTML. The same goes for stylesheets, files to download or whatever else you want to share on your CDN.
At any time you can add new files to your digitalisticcdn subdirectories (/images, /stylesheets etc) and run the deploy_digitalistic_cdn.bat file to upload them to Google. If you remove files from your digitalisticcdn directory and then run the bat file they will be deleted from your Google application.
You can check the statistics of your Google Application at appengine.google.com. For example you can see how much bandwidth and disk space you are using. It will take quite a lot of files and usage for you to use up the resources you get for free, but if you have a super popular site then it is worth taking a look here every now and then.
If you have read so far and found all this usefull then please Digg it. Thanks!