When I started to use WordPress one of the main problems I had was how to move a WordPress site from my local computer to my web host. There are some posts out there on how to deploy a WordPress blog, but quite a few of them are a bit too complicated. As with most things this problem is easily solved once you know what you are doing. It hit me the other day when I did just this for f1almanac.com that since I have now done this dozens of times I think it is time to share it with whoever has the same problem. Hopefully I can save somebody some time and frustration. So here is a step by step guide on how to deploy WordPress from localhost to your production web host.
Basic setup
I assume you have WordPress installed on your local computer, including a MySQL database and all. There is a really good guide on how to do this on WordPress.org. Once installed I also assume you have played around with your theme and settings and gotten the WordPress site to look and work just the way you want it.
My second assumption is that you have an account at a web host that supports PHP and allows you to setup a MySQL database. If you don’t then you can easily find many good cheap options via my web hosting price comparison site WebHostNinja.com. Many web hosts have one-click installs of WordPress, but this is nothing you need right now.
My third assumption is that you have a domain or subdomain where you want to have your fantastic WordPress site installed on. In this post I use the target domain name f1almanac.com, since that is the latest WordPress site I have deployed. Of course you need to replace “f1almanac.com” with your own domain name in all examples below.
Move the files
The first thing to do is to copy all your WordPress files from your local computer to your webhost. In my case this is all the files under /projects/f1_wp/ that I move to the directory on my host that corresponds to the domain I have choosen. For now just move all the files, no need to change anything in any file.
Move the database
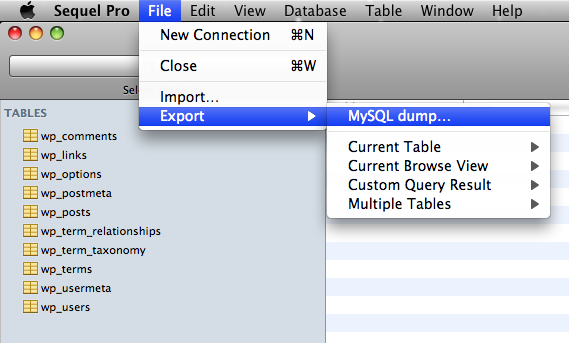
Next thing is to move the database structure and all it’s content from your localhost to your web host. First of just do a MySQL dump of the structure and content of your WordPress schema. This can be done in most MySQL GUI applications. Personally I use Sequal Pro and there the MySQL dump option is hiding under File->Export. Refer to the help files of your MySQL GUI app (or MySQL command line if you are hardcore) how to do a dump. The dump should result in a .sql file containing SQL statements to create all tables needed as well as inserting all the data needed into those tables.
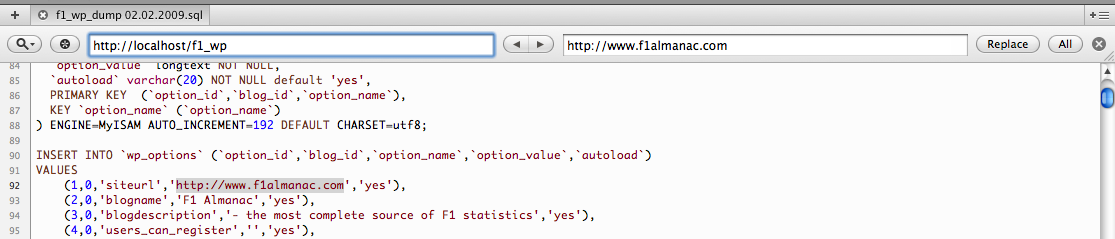
Now we need to change some stuff in that .sql file. Open the file in a text editor and replace all local URLs to the URL of your new site. For me this means changing “http://localhost/f1_wp” to “http://www.f1almanac.com”. Without doing this your production WordPress installation would refer back to your localhost, and stuff would just not work. As always with search and replace, take it easy so that you dont break anything.
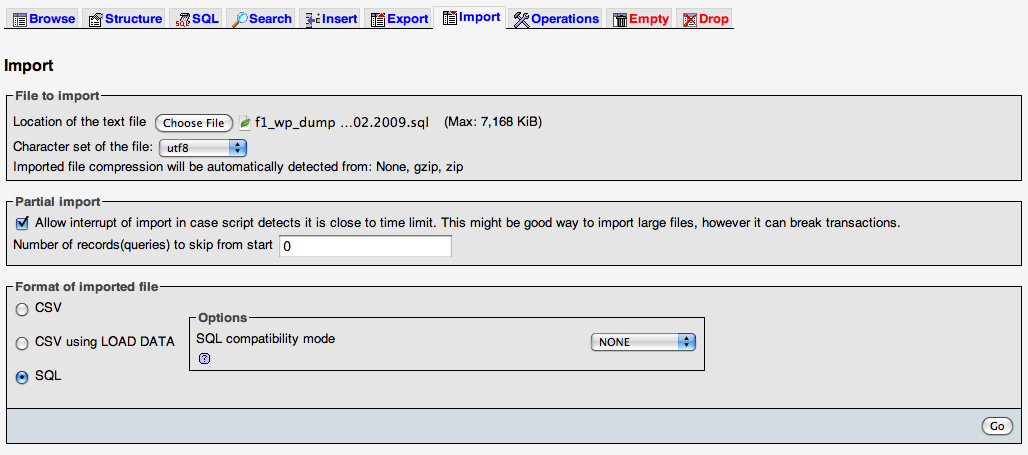
Create a new MySQL database on your web host, and open phpMyAdmin (or MySQL client of choice) for that database. In the “Import” tab of phpMyAdmin you can import an SQL file, so choose your newly edited .sql file and click “go” to import it. This creates all the tables needed and fills it with all the content you need, this includes pages, posts, plugin settings etc.
Change database configurations
At the moment the WordPress installation on your web host do not connect to the newly created and populated database, to do that just open wp-config.php on the host in a text editor (this is one of the files you uploaded to the host ealier). In the top of the file you find all the DB settings, so change DB_NAME, DB_USER etc to correspond to your new MySQL database and not your local database.
Once that is done you should have a fully working WordPress installation on f1almanac.com, or at least on your own domain 🙂
Final touches
Now things are working fine, but there are still some final touches before all is done. First of all your should probably login to /wp-admin on your newly deployed site and change the password of your admin user. I use extremely simple passwords on my localhost while developing, but I do not want to use simple passwords when things are live. So if you work the same way as me go and change the password to something harder to crack than “guest”…
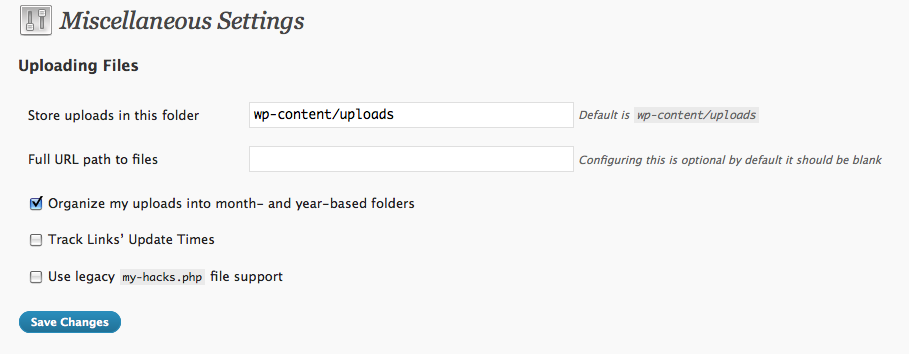
Last thing to check is that your media files are uploaded to an existing directory. Login to the WordPress controll panel and go to Settings->Miscellaneous. It is very likely that the “Store uploads in this folder” is set incorrectly, since it was set when you installed WordPress on your localhost. Change it to the default “wp-content/uploads”, otherwise you will not be able to upload media files successfully.
That’s it. This is a technique that has worked fine for me many times, but I am sure smarter people than me has better solutions to this. If you are one of those smarter people please share them with us all in the comments of this post…
